First of all you need to make a clayx for the base of the rose, this is the green 'petals' if you like at the base of the rose. For this you will need a calyx cutter, you can get various sizes depending on the size of your roses.
Once cut out, glue the entire calyx and thread your onto your rose wire, then once in contact with the rose glue the calyx in place, curling the corners of the leaves down if you wish.
Once this is done, add a small knob of green sugar paste to the base of your rose and leave aside to dry. Now you can make you leaves. First you need to roll a small sausage of green sugar paste and thread a thin gauge wire into one end. Once the wire is in place you need to roll the green paste with a narrow rolling pin, either side of the wire. If you roll direclty over the wire it is likely to pierce the paste this is why you roll either side of the wire.
Once this is done, ensure your paste is not stuck to your board and using your rose leaf cutter, cut out your leaf, place the top of the cutter near the top of the wire within the paste, and trying to ensure the wire runs donw the centre of the cutter.
Once your leaf has been cut and veined, with a small paint brush you should set about highlighting the veins with a dark green dust, and highlighting the edges of the leaves with a burgandy dust. Once you have dusted your leaves you need to glaze them and leave them to dry.
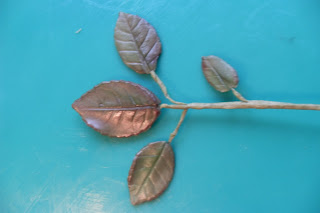
It is normally best to make up as many leaves as you require in whatever sizes all at one time. Generally roses have symetrial leaves going from larger to smaller leaves, with 1 large leaf in the centre and two smaller leaves either side of this. Some smaller leaves can then somethimes be found on down the stem.
Once all your leaves and the rose calyx has dried you need to set about covering the wire on each with florists tape (normally cut in half up the centre, as it is usually too thick for such narrow wires). Once eash has been covered in florists tape individually you can then set about putting them together in whatever format you think will look best.
I added three larger leaves to the top of my red rose and a smaller leaf at the side lower down. That is then your finished rose ready to be used in decorating, just remmeber if placing the rose directly into a cake to use a flower pick so the wires are never directly inserted into the cake.
I have also now learnt how to make blackberries, blackberry leaves and rose hips, any combination of which can then be added into a section to provide more colour and interest and cover a larger section of any cake.


No comments:
Post a Comment