Sunday, 23 October 2011

Green Fingers

This is the second part of the sugar paste roses tutorial I added a week or so ago.  In this post I will demonstrate how to finish the roses off and make all of the greenery associated with sugar roses.

First of all you need to make a clayx for the base of the rose, this is the green 'petals' if you like at the base of the rose.  For this you will need a calyx cutter, you can get various sizes depending on the size of your roses.
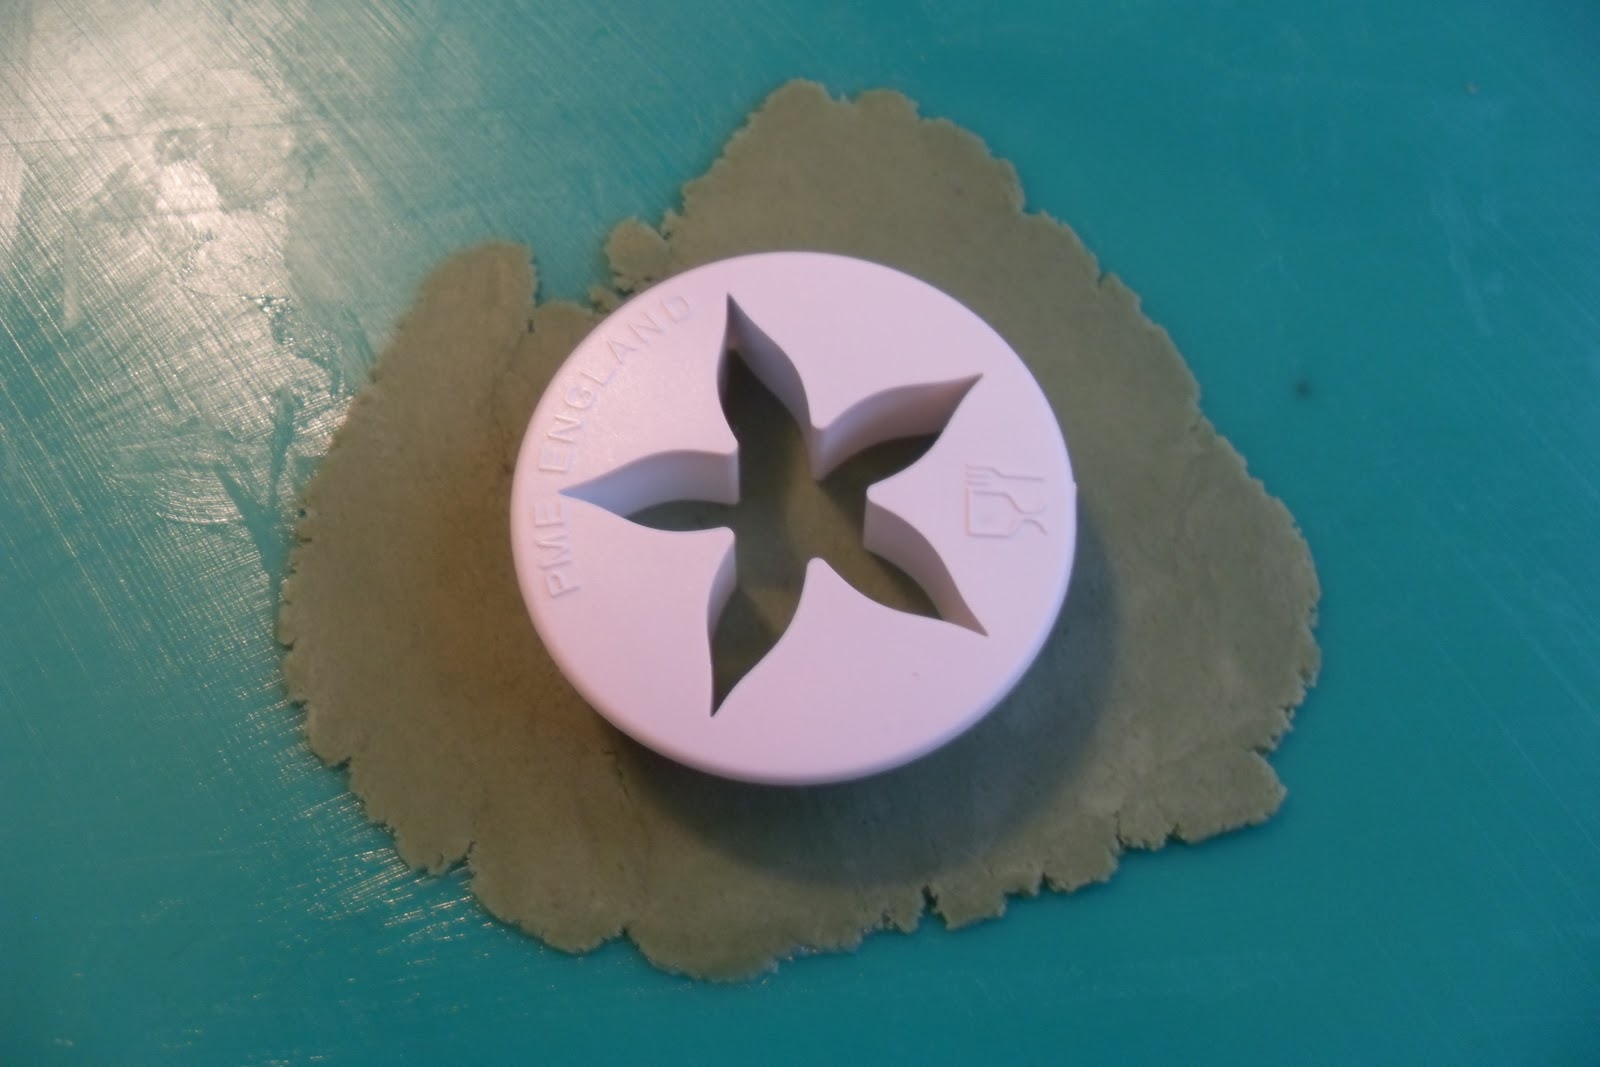


Once cut out, glue the entire calyx and thread your onto your rose wire, then once in contact with the rose glue the calyx in place, curling the corners of the leaves down if you wish.


Once this is done, add a small knob of green sugar paste to the base of your rose and leave aside to dry.  Now you can make you leaves. First you need to roll a small sausage of green sugar paste and thread a thin gauge wire into one end. Once the wire is in place you need to roll the green paste with a narrow rolling pin, either side of the wire.  If you roll direclty over the wire it is likely to pierce the paste this is why you roll either side of the wire.


Once this is done, ensure your paste is not stuck to your board and using your rose leaf cutter, cut out your leaf, place the top of the cutter near the top of the wire within the paste, and trying to ensure the wire runs donw the centre of the cutter.

 Once your leaf is cut, you can then use a veiner to add leaf veins, I however, normally use real rose leaves stuck on either side of the sugar paste least and pressed into place to provide realistic veins for my leaves.


Once your leaf has been cut and veined, with a small paint brush you should set about highlighting the veins with a dark green dust, and highlighting the edges of the leaves with a burgandy dust. Once you have dusted your leaves you need to glaze them and leave them to dry.


It is normally best to make up as many leaves as you require in whatever sizes all at one time. Generally roses have symetrial leaves going from larger to smaller leaves, with 1 large leaf in the centre and two smaller leaves either side of this.  Some smaller leaves can then somethimes be found on down the stem.
Once all your leaves and the rose calyx has dried you need to set about covering the wire on each with florists tape (normally cut in half up the centre, as it is usually too thick for such narrow wires). Once eash has been covered in florists tape individually you can then set about putting them together in whatever format you think will look best.
I added three larger leaves to the top of my red rose and a smaller leaf at the side lower down. That is then your finished rose ready to be used in decorating, just remmeber if placing the rose directly into a cake to use a flower pick so the wires are never directly inserted into the cake.

I have also now learnt how to make blackberries, blackberry leaves and rose hips, any combination of which can then be added into a section to provide more colour and interest and cover a larger section of any cake.

The final picture here is my largest bunch to date, including blackberries, rose hips, a range of roses in different sizes and at different stages of bloom, rose leaves, blackberry leaves and even a little blackberry flower.  I was really please with how it all turned out and hoope to add to it and use it on a cake in the near future.

Tuesday, 18 October 2011

Sleepy cat

It was my friends 30th birthday last week and she was coming round to our house on saturday night for some drinks before heading out for a boogie to celebrate. She is cat mad and is hoping to get her very first cat in a month when she moves into a new house with a garden.  She had been telling me how she really wanted a white cat, so after my blog post a few weeks ago with the sleeping cat cake which inspired me, I decided to make her a sleeping white cat cake for her birthday.

As there were only a few of us heading out I made just the cat and not the cushion cake underneath as I thought that would be a bit too much cake for so few of us!  I started by baking two round victoria sponge cakes and left them to cool.


Next I added the bottom cake to the cake board and cut it into shape, I then added a layer of jam and buttercream I then added the top cake and carved it into a more cat like shape and added ears.


Next the cake was covered in a crumb coat of buttercream left to set and then another buttercream layer was added to smooth the cakes shape.  I then added rolled fondant in white over the top of the cake and smoothed into place.


After the icing was in place I decide it was all a bit too white for my liking, so added some grey patches to the cat.  I then iced the cake board to look like grass and added flowers.  Finally the cats features were drawn on with a food colouring pen and I added a tail, and two front paws (the back two supposedly would be tucked in under the cat). Finally I added some plastic white cocktail sticks as whiskers ET VOILA, one sleeping cat cake.


I was reasonably happy with the final cake although I think I made the mouth far too big and was thinking more cheshire cat than normal cat, but hey a happy cat isn't a bad thing and my friend seemed very happy with her cake when I gave it to her :)

It national baking week this week, so I hope everyone is making lots of scrummy baked goods to share, I am currently in the midst of baking a batch of 36 halloween themed cupcakes for an 'order' a family member has put in, I will share the results when they are finished. In my sugar craft course this week we are being shown how to make a 'whizzy the witch' for hallowee, so can't wait for that either, I will maybe run a blog post on this at a later date.

Saturday, 8 October 2011

From Russia with Love

I recently purchased these adorable measuring cups from my local Lakeland store.  I had spied them a few weeks ago but was a little broke so didn't buy them, but I knew it was only a matter of time before they were in my kitchen.  These adorable little measuring cups come in the shape of three russian dolls, which then all fit inside one another for storage (a brillaint feature when you have a lack of storage space in your kitchen like me). The cups are made up of the individual tops and bottoms of each doll and they measure 1/4, 1/3, 1/2, 2/3, 3/4 amd 1 full cup measurements. 

They are made from heavy duty plastic and have little faces and patterns embossed onto them for decoration.  They are decorated to look like the traditional Matryoshka dolls from Russia and I think they are so adorable. I remember having some of the traditional Matroyshka dolls like the ones below when I was younger and really loving them. I did always feel a little sorry for the littlest doll though as she never got out much :)


I think these new little additions to my kitchen may be too cute to keep in the cupboard and they may end up as a new decorative feature in my kitchen. I now can't wait until I need to use them.

If you want to get your hands on the little dolls yourself you can look in your local Lakeland store, although I cannot seem to find them on their website, they do have similar ceramic ones which are coloured which are also lovely: http://www.lakeland.co.uk/15548/Russian-Doll-Ceramic-Measuring-Cups

Coming up smelling of Roses


Hi everyone,  so I am currently enrolled on a sugarcraft course one evening a week. It is a 15 week course and I am already on week 5 (time is flying by). So I decided to start sharing some of what I have learnt on my course and I am going to start with sugar roses.  I will cover this in two seperate posts with the first half explaining the rose itself and the next post describing the greenery (leaves etc.)

SUGAR ROSES INSTRUCTIONAL, PART 1:

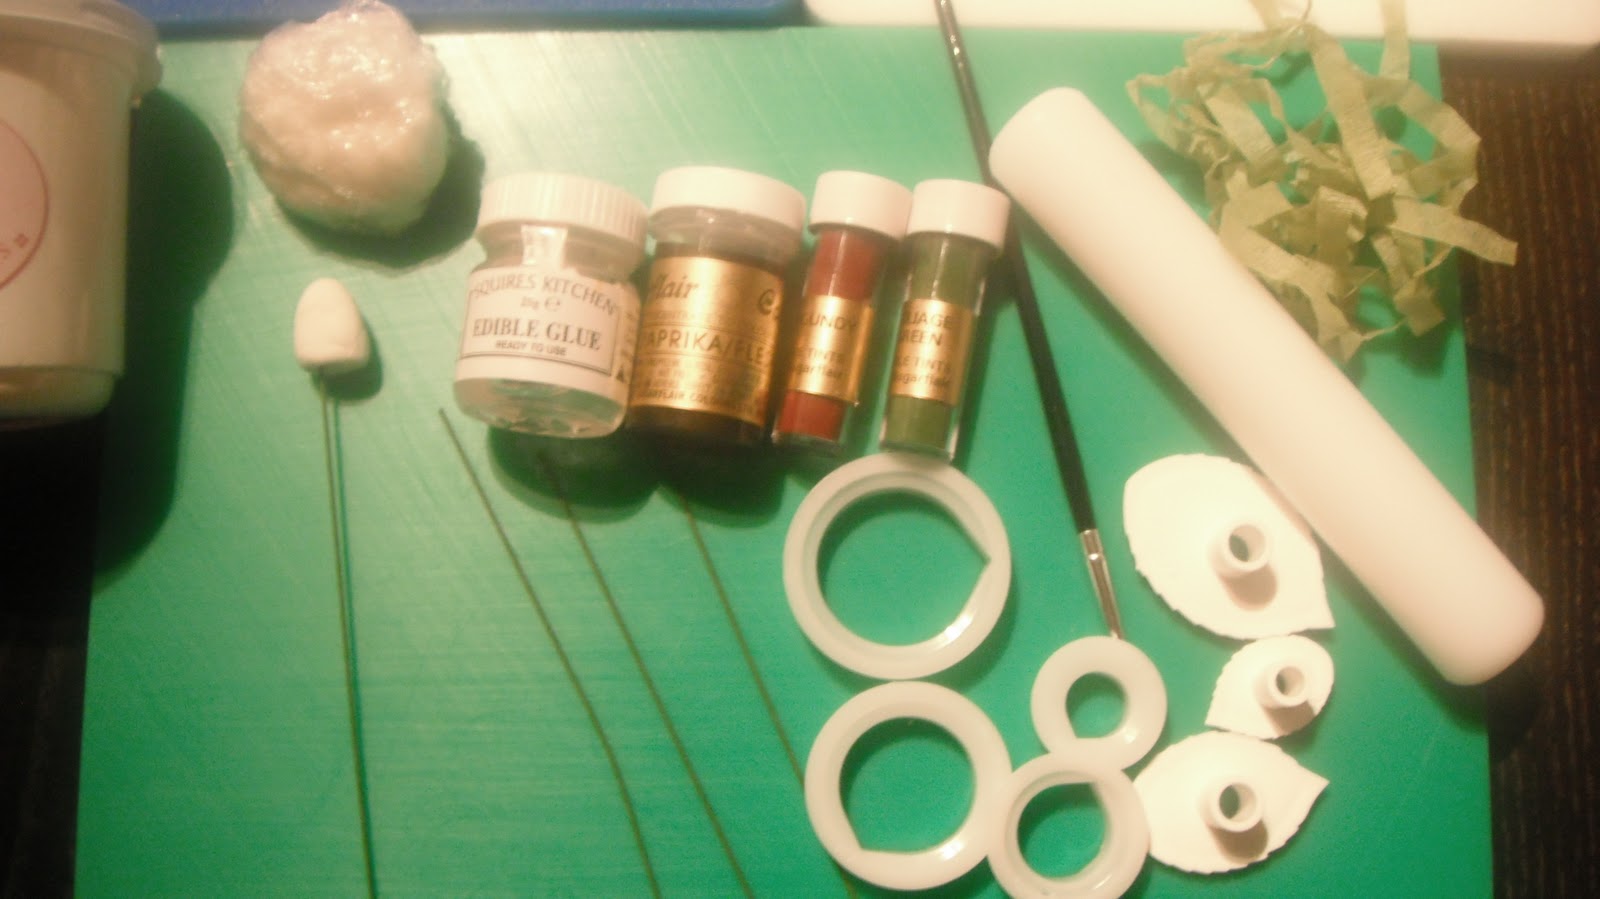
So first off here is what you will need to make your own sugar roses and greenery:

*Florists wires (30 gauge is recommended)
*Florists tape (to cover the wire)
*Sugar paste (whichever variety you prefer)
*A large rolling pin
*A smaller rolling pin
*A sugarpaste board
*A foam pad
*Sugarpaste colourings and dusting colours to match the desired colour of rose.
*Edible Glue
*A paint brush
*Rose petal cutters
*Rose Leaf cutters
*Rose Leaf veiners
*Sugarpaste Glaze

1. Rose Base: So once you have everything and are ready to make your first rose you need to roll a piece of sugarpaste (any colour as it will end up covered, although I normally just use white) into a ball, I work normally with a base about the size of a malteser.  Once your ball is made roll one end down to form a cone shape. Next bend a small hook on the top of a piece of the floists wire.
Note: the wire must be strong enough to support the weight of your finished rose, this is why I recommend 30 gauge as it will normally support an average sized rose.


Next dip the bent end of your wire into the edible glue. Then  place the glued end of the wire into the base of the cone.  Once inserted leave the rose base on the wire to dry overnight, you need both the paste and the glue to dry as the weight of the petals will lead it to fall off the wire if it is not fully hardened and glued in place.


Note: the size of your rose base will dictate the size of the rose you make, so for smaller buds you need a smaller rose base and smaller rose petal cutter.


2. First 2 petals:  Once your rose base has dried (and the glue attached to the wire is dry) you can make your first two petals.  Roll your sugarpaste (whatever colour you prefer) relatively thinly and cut out two petals and place them on your foam pad.

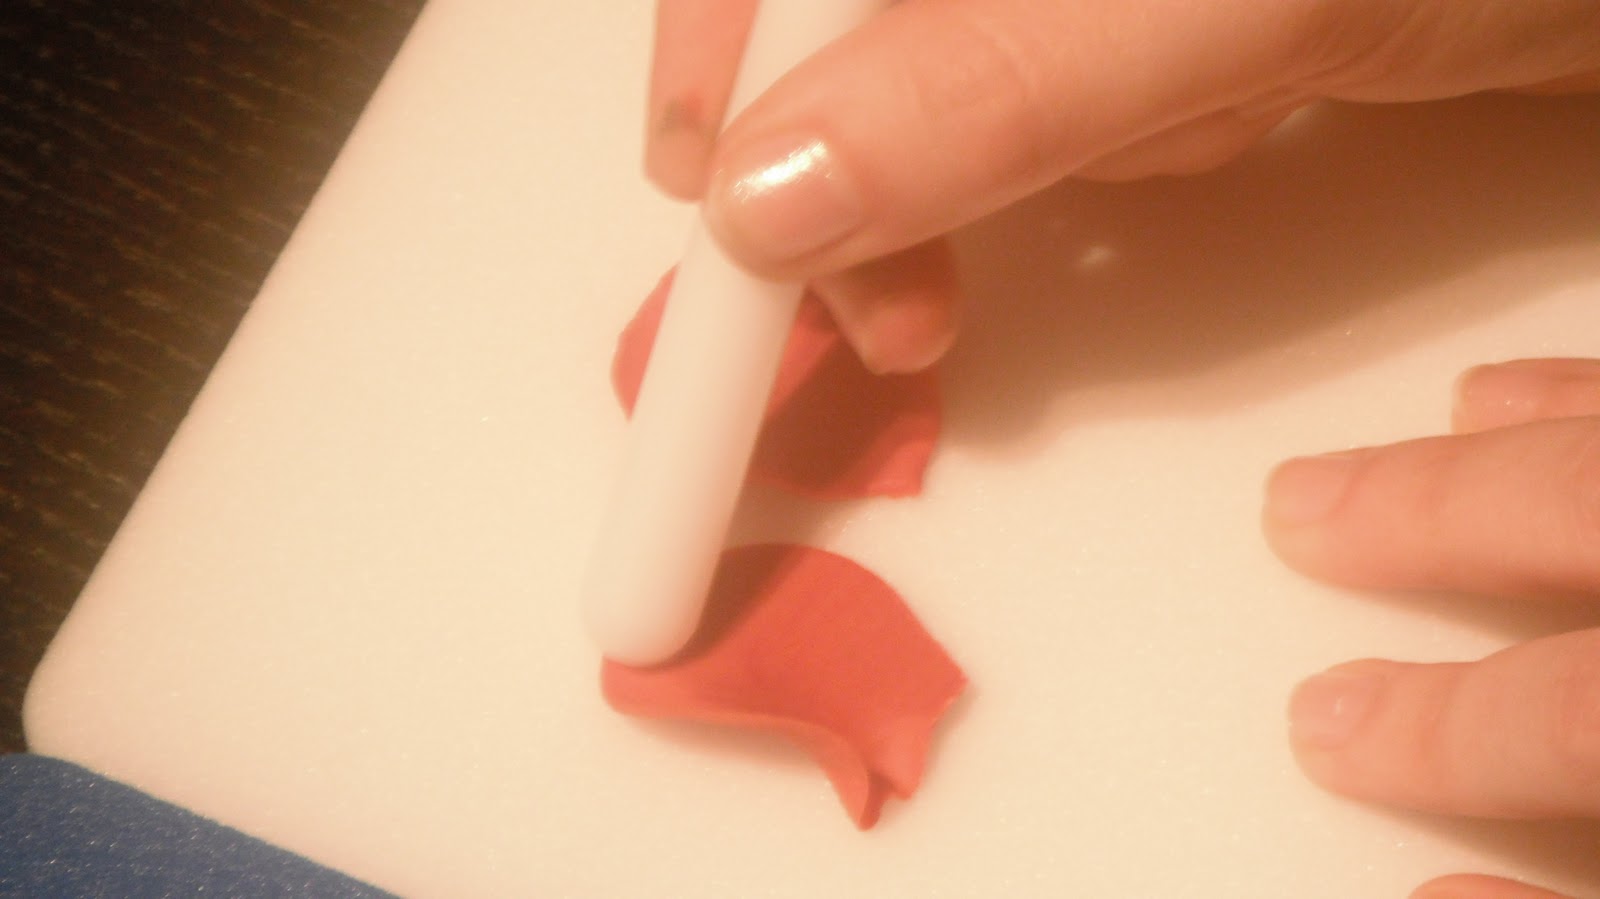
Next use the tip of your smaller rolling pin to roll around the edge of each petal to curl them.  You need to keep half the rolling pin on the foam pad and half on the petal to get the best curl.  It is generally easiest to start rolling from the tip at the base of each petal and move around the petal edge.
Tip: The trick to this is to apply enough pressure to curl the petal tips but not too much to break the paste.

Once they are curled add glue to the bottom half of each petal using a paintbrush for application. Now you are ready to place your first and the most important petal! Place the glued half of your petal to the base of your cone. Once in place, curl the top of the petal into a '9' shape as looking down on the rose from above.

Once glued in place you can then add your second petal, directly opposite the first and curl around from above to surround the '9' of your first petal. In the end you should have something like the picture below.
3. Next 3 petals: Next cut out another three petals and curl as above. Apply glue to the bottom left corner of each petal.

Attach the third petal to your rose, opposite the second petal. As you have only glued the left hand side of the third petal base, you can then slot the fourth petal under the unglued right hand side of the third petal. Once the third and fourth petals are in place add glue to the rest of the base of the third petal and glue down (on top of the fourth). Repeat the above process with the fifth petal (slotting underneath the fourth). Finally glue the fifth petal down the whole way round. You should end up with something similar to the picture below, where you can easily tell the petals are overlaid on top of eachother.


4. More petals: Now you have your first five petals you can now add as many more as you want.  These petals can all be added by gluing the bottm half of each and you shoudl not need to overlap these petals as you did with the 3rd-5th petals added. Add these petals moving around the rose until you feel your rose is finished.


5.Final Rose:  Now you have your finished rose you do not need to worry if your rose base is still partly visible, it will be covered by foliage when the calyx is added to the base of the rose.

I will show you how to make the foliage, calyx and leaves and finish your rose off in another post.  I hope you enjoyed this post and found it easy enough to follow.  Enjoy making many roses in the future.  I have now made quite a few in various shapes, sizes and colours, and plan to make many more in the future.

Friday, 30 September 2011

Crazy cakes!

Ok so I have been scouring the web the past few days looking for inspiration for novelty cakes I could make in the future.  I am currently putting my (somewhat limited) talents on offer to friends and family to make cakes for special occasions to help me build up experience in making FUN YUM cakes! This will also mean I have a bit more to share on here in my blog.

I am particularly interested in novelty cakes for brithdays etc.  As a first port of call I of course hit the internet to find inspiration, however, I soon came across some wonderous amazing cakes and some.....er.....well lets just say not so wonderous cakes :)  So I thought I would run a quick post on cakes currently inspiring me and cakes which made me smile for various reasons (I am sure you will know why when you see them).  I may run more posts like this in the future as and when I come acros cakes that interest me.

So first of all I will show you some cakes which have inspired me in the past few days, many of which I doubt I could ever aspire to make but which I look at in awe, some I can't even believe are actually made of cake!


Scratt from Ice Age, I LOVE this cake so much!

I love that on this cake the cat is already impressive and thn the cushion just takes the wow factor up a whole notch. How could anyone ever eat this little kitty, it is too cute :(

This wedding cake made to look like a pile of cushions definatley made me 'wow' out loud. Impresive both in scale and the balancing of cake, a feat in itself.

Octopus cake: there are no words for this one!

So after those amazing cakes here is another little gem I found, amore light hearted cake which, I came across with my office mate (who is squireel mad) which made us both smile and laugh:


This 'squirrels attacking a wedding cake' made me smile so much, the little squirrel peaking his nose out of the middle layer I found particularly cute.....more photos of this cake (which is well worth a look) can be found at the following web address:

http://urbansweets.wordpress.com/2010/10/11/squirrels-attack-wedding-cake/

I even later found a real life example of a squirrel eating someones wedding cake which made me smile even more :)


I hope you enjoyed this post, I have found quite a few more cakes in my internet trawls which I will save to share another day, in the meantime, the lesson of this post is to make sure there are no squirrels nearby if you are ever making a wedding cake or it may not survive in one piece  :)

Thursday, 22 September 2011

Peppa Pig Brithday Cake

So it is my god daughters 2nd birthday tomorrow, and her mum (my best friend) is being induced with her second baby that same day, hectic! So as a wonderful and thoughtful godmother (modest, who me? yes always!) I decided I would offer to make a birthday cake for my god daughter to enjoy on her birthday morning before her mummy went to hospital. Knowing how much Peppe Pig was loved by my god daughter (any maybe me secretly, but shh) I decided to make this the themd of the cake.  After a quick internet search I found a picture of Peppa and drew a plan for the cake.


I then baked a large square victoria sponge cake and after this had cooled I added buttercream and jam in the middle before beginning to shape the cake into something resembling Peppa.

I used my drawing a template to cut the Peppa shape and then added an outer layer of buttercream to help the icing stick and smooth any irregularities in the cake surface.  Next step was to add the icing.  I used ready to roll fondant and added pink for the face and red for Peppa's dress.  Then I added a few extra bits for ears, mouth....etc.
Once this was done I used a dark pink icing to pipe the outline of all Peppas features, to make it more like the actual cartoon, I also added a large '2' onto Peppa's dress.
Once this was all done I decide to ice the cake board with a sky and grass to make the cake 'pop' off the board more and compelte the look.  This was the first time I have ever iced a cake board and it was quite trikcy with the shape of the cake to manouver around! But I used the trick of wrapping the rolled icing around the rolling pin to help with smooth placement.  Once the sky and grass were added I put on the finishing touches of the arms and (slightly stumpy, due to the cake board being a bit small) legs and tail to the cake, and here is the finished product:

I was really pleased with how the cake turned out and have delivered it for the party just this morning.  I cannot wait to hear what my god daughter makes of her cake, I hope it prooves a success!

Monday, 12 September 2011

Cupcake Party

I had a cupcake themed party for my birthday last summer, which involved me making copious numbers of cupcakes and inviting all my friends round to eat them! It was great fun, but not very well thought out as I then ended up spending my whole birthday baking frantically, which was quite stressful.


My other half did, however, manage to whisk me off at lunch time for Afternoon tea at a nearby hotel in Belfast, called 'The Merchant' (http://www.themerchanthotel.com/). It is one of the best hotels in Belfast and is based in an old bank building which is beatiful inside and out. Afternoon tea is served in the great Hall, which is absolutely stunning inside. The whole afternoon was fantastic and along with some sandwiches and speciality teas we also indulged in pastries, jellies and scones with clotted cream and jam....It was immense!

The Great Hall, where Afternoon tea is served.


Our triple tiered tray of treats, Yum!

The whole thing ended up being our lunch and then we just had cupcakes for dinner....not the healthiest of days but lots of sugar rush fun was had!

I have included a few pictures of some of the cupcakes I made for the party that evening. I made lemon flavoured cakes, rasberry and chocolate and even banoffee. I also made some Sesame street themed cakes for friends, with the cookie monster for my other half (who loves cookie monster) and Oscar the grouch for his best friend who had dressed as the charachter for a party a few months prior. Kermit also got thrown into the mix for a bit of fun.

Banoffee cupcakes (I will include this recipe in a seperate post at a later date)

Chocolate cupcakes, topped with whipped cream and rasberries

My Sesame Street cupcakes: I used a vanilla cupcake as the base and then iced them adding white chocolate Maltesers for eyes, with pupils drawn on with a black food colouring pen.  I then added a section of cookie to the cookie monsters mouth to make them extra realistic.  I was very pleased with how they turned out and have made the cookie monsters again since.